faux bricks

I am a BIG fan of home-improvement-DIY (I was contented reading and admiring from afar). But until recently, I never imagined to take on any project…maybe due to lack of REASON (or mostly lack of confidence) but this blog has been motivating me (the blogs I discover make things achievable where as before I have consider impossible for someone as unskilled and lazy as me)

so after 4 years since moving-in our house, this wall will finally have a make over (were this wall alive, it must have fainted seeing me with a roller brush). A photo of the before (to justify my project)

subject: a plain-white-semi-gloss-painted wall

materials: masking tape, paint (I chose the odorless, children-friendly kind which is a little pricey), roller brush, pan (for paint)

procedure: (my own version, follow me at your own risk :D…or do it right and Google  DIY faux bricks)

1. free the wall from dust ( scrubbed a little here and there)

2. layout the masking tape (i used the thinnest i could find maybe around 5mm-thick)

3. apply paint with a roller brush (not too thickly because it will saturate the masking tape and you will lose the crisp lines when you peel the masking tape…i know because we double coated this wall). Brush vs. roller : I went with roller because it covers more areas and less dripping (I din`t even use newspapers to cover the floor tiles…I just had a handy wet cloth to clean-up any misplaced paint)

4. peel off the masking tape (I took the advise from other DYI-ers to not let the tape sit for too time…so after 15min after we finished painting the wall, we started to take off the tapes,,,luckily the paint dried quickly but not to dry that the paint of the `brick` peeled too)

5. finally the reveal. This project took us one day to finish (including the numerous breaks plus mommy duties). I find this project gratifying not only did it bring a big change in the living room but it’s also a bonding moment (productive) of me and my very supportive and hardworking crew. Thank you kids (I love you very much)

I still have that area to retouch 😀

DIYing is more fun with the family.

AWOL

hello. it has been a very long while since my last post… after our three (very short) months vacation in Japan, coming home is a little disorienting. we have been busy resettling again…organizing the house, enrolling in school (classes starts in June here in the Philippines), etc etc…more excuses 🙂 for failing to post :))…but THIS mommy has not been idle, I have been busy doing DIY projects (whenever I can sneak from my mommy duties) and here is me playing Picasso

I can`t find a big enough canvas from the supply store…so I just made my own from leftover plain fabric which I stapled on the frame of my previous wall filler. This is actually 1 meter by 1 meter in dimension…I know it’s too big but knowing me, always taking that step closer to craziness they say.


since I used an ordinary fabric (I was worried that my son`s water color won`t work so I decided to go for textile paint…the one used for silk screening) also, I was thinking (yeah I`ve been doing this a lot lately, my brain is in overdrive) even if I used all my son`s coloring devices (water color, colored pencils and even crayons altogether), they wont be enough to cover the whole canvas. as for my inspiration, click here  I followed `most` of the instructions here (i tried really)

1. apply base coat (but the canvas was too big and the paint brush is so small, actually I am just lazy and anxious to finish)…so I just base coated the part which I thought wont be covered by the drip

2. thickly painted one end but was impatient to wait for the drip to come so I just let go …gone crazy and just poured the textile paint here and there until I used up all the blue paint.

Now for the finished product:

I know it’s a light year from `the inspiration`…my father was even laughing at my curiously abstract painting…he kept on…`is this it? is it done?` …`what are you trying to convey here, cant figure it out`….haha, regardless, I am still really very HAPPY because I have done IT…like learning bicycle, exhilarating even with bumps and scrapes.

This is fun, try it yourself. Now I have a `conversational` piece in the livingroom.

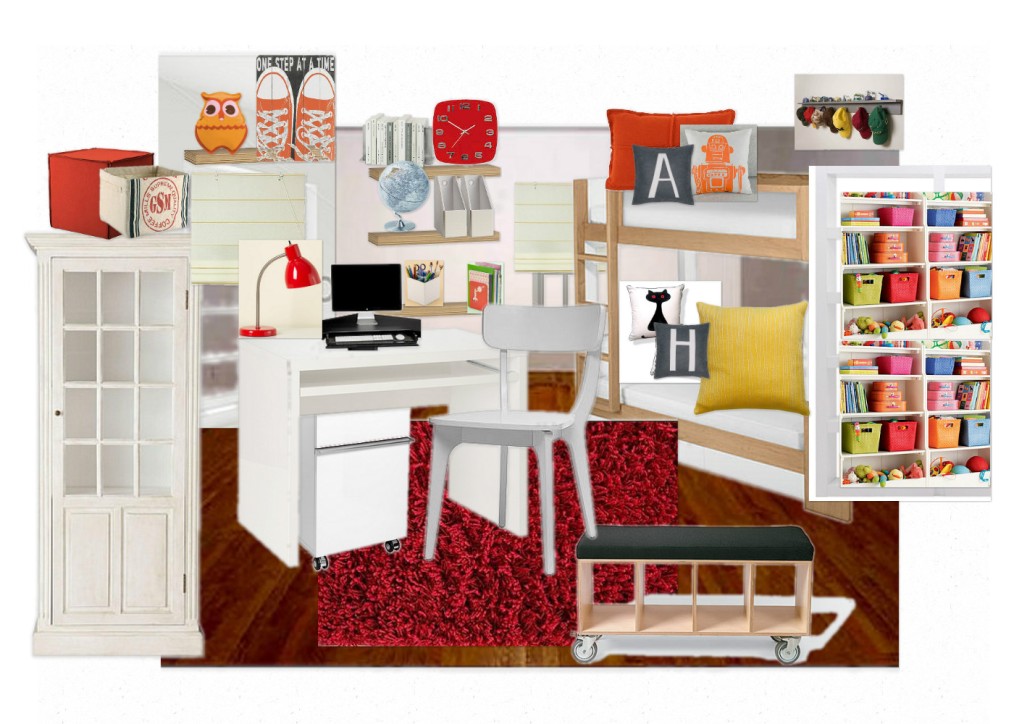
Mood Board by OLIBOARD

Mood board is nothing new to professional designers but even to non-professional wannabe designer A.K.A me, it can prove to be very useful. if i had known Oliboard sooner, i may have saved some bucks and avoided regretting my purchase…you bet I have big `regret` eating half the space of the living room…anyway what is done is done, i just have to make the most in what i already have. With the mood boards, you can experiment on the look that you want to achieve without actually purchasing the items or lifting a muscle…. I find it easy to use and most importantly its FREE (just register). Also, it can give you ideas on the latest design trends for furniture so its can be a fountain of inspiration.

almost all the design blog I love have an oliboard (mood board) category…so it must really be effective…here ARE my GOALSImageImageImageImageImage


NO SWEAT chair reupholstery

The blog of Young House Love and Ana White have been inspiring me this past few months….every chance I get a hold of the laptop, I am engrossed in reading their DIY story and I find myself staring in space (dreamily)  and today I am very proud to announce that I have taken my very first baby step into the world of  DIY.

Since this is my first project, I was thinking of spending NOTHING at all 😀 (I wasn’t sure if DIY will be right for me, reading and appreciating a blog is different from actually working my muscles so I don’t want to be buying unnecessary stuff that will end up as clutter…i wanted to work with something that I already have)

Problem: 15-year-old chair ( my parents can’t let go of the old stuff)

Materials needed: unused curtain, gun tacker, screw driver

Procedure:

  1. used screw driver to dismantle the backing and seat from the chair frame
  2. staple the old curtain to the backing and seat
  3. screw back the backing and seat to the chair frame

before

after

When I started this project, my hands were shaking but when I was taking the pictures of the finished product, I feel proud and accomplished. Actually making this post took longer than upholstering this chair. I hope to do and post more DIY in the future.

PAVERS

I am a newbie through and through (in blogging, writing, photography)…I have to confess until now I am confused with the buttons/features to click…and sometimes I fear I`d mix-up posting comment or liking a certain blog (so far I haven`t made a fool of myself)….have to keep going

So while out and about with the kids, I practiced by photography skills… (which is kinda embarrassing…seeing all the wonderful pictures of other bloggers)…have to keep trying

I took inspiration from other bloggers, seeing something extraordinary from the ordinary. Photos were taken in and around Nishichiba JR Station 🙂

This slideshow requires JavaScript.

TORI gatessss

Right now we are staying in the Kanto Area of Japan, we live 45 minutes away from Tokyo and for our summer getaway we decided to see Osaka. Since Kyoto is along the way, we thought `why not, lets drop by and see what to see` …I am THE planning department, so I googled for the best/number 1/must see place in Kyoto given limited time. Click here for recommendations. And we chose to see Fushimi Inari Shrine.

TORI GATE-the merlion of Japan

According to travel reviews, this place is majestic and a mecca for photography enthusiast….ITS ALL VERY TRUE.

Through the Tori Gates

On our way down

Unfortunately, the `lots of hiking part` is also VERY TRUE…(Note: no entrance fee so good for budget trip) this place has it all shrines, old tradition, lots of souvenir shops, food.

… we have  but covered only 1/8 (or less) of the area when we came to a halt and call it a day because of the SOS signal

none can resist the siren`s call

We will definitely comeback and see ALL the thousand Tori Gates (maybe after a year or two or more:)))

IKEA.co.jp

If Disneyland is to my kids then Ikea is to me 😀

This store to me is a feast to the eyes, I love the designs, colors and set ups…can`t get enough of looking around. My husband is so LUCKY, I made sure to pack my extra dose of self-restraint before our visit :))but in all fairness they (my husband and kids) are such good sports…no whining, no making faces, not a word of complain while I was on the Death-March-Mode (endless window shopping). With my peripheral vision, I see them enjoying…making a playground out of the showrooms (its alright as long as they don`t break anything). But really no one has to suffer if this trip is planned ahead, how? you can do your window shopping via internet, click here. you can browse all the items (very detailed from price,to availability to package size,to sale products) if you are interested in certain items you can take note of the product code so when you get to the actual store you can use their computer (searching device) to locate the items you want by typing their codes . But of course seeing the product in actual set-up is more fun, I get more inspired and my imagination is working non-stop. Click this to get more hyped-up, Ikea Hack.

Ikea Japan

Don`t forget to get a membership card (signing up is free). Attached to the application form is the temporary card you can use right away.This can get you discounts and avail of promos.

I find Ikea a family oriented shopping mall,  they provide play areas for kids, they even have a place where children can sit down with their dads and watch cartoons on a big television. It is also here, I find the most affordable sausage sandwich in japan for only 100Yen (150yen with bottomless drinks). While in their restaurant section, they have very comfortable sitting areas where the family can dine and relax after a vigorous day of shopping. By the way if your purchases are too big  to carry home, Ikea have delivery services (very convenient).

Although not everyone is a fan, it still feels good to know that a stylish and organized home is achievable.

Tap your inner handy-Manny 🙂

DIGITAL VENDING MACHINE

ACURE DIGITAL VENDING MACHINE

Photos of the Acure Digital Vending Machine are all over facebook. I was curious (but not so much) with what everyone was buzzing about but to me it was just another vending machine.

whenever we went out, we (I meant my husband and I) are too preoccupied with searching for the elevator sign (for the stroller), or looking for a vacant chair to rest while waiting for the train, or looking for the restroom or making sure the kids are happy to avoid any disaster.  so I never notice if there was any Digital Vending Machine lurking around the station where we were ( or I would have gone out of my way and end my curiosity :D)

We were at the Nishi-Funabashi Station, when the opportunity presented itself in the form of approximately 5feet x 4feet x 1foot shiny cabinet (my opinion remains unchanged ….a dressed up vendo machine). My 7-year-old son bought a bottle of water, to him the experience was おもしろい (omoshiroi-funny, interesting)…the process was still the same you either put some money or you can swipe your suica card then touch the image of whichever drink you like and poof your chosen drink appears. While my husband started discussing the merits of the new vending machine (how way better this new vending machine is) , I  noticed that people were starting to flock around the vending machine waiting  their turn to buy.

I bet they were not very thirsty until they realized it was the NEW ACURE DIGITAL VENDING MACHINE :DD. They must have been as preoccupied as we were  🙂

Click here to read more about ACURE DIGITAL VENDING MACHINE, and maybe like me you will see this new rave in a different light and find more respect for technology improving the way of life.

CHEERS 🙂

Re-USE

Our cabinet is so much like Harry Potter`s ROOM OF REQUIREMENT…it never cease to amaze me. or maybe it pays off to be forgetful, finding long forgotten stuff is as trilling to me as  having a good bargain :DD

Many would find me crazy because I have a habit of  keeping things which others might consider trash but  I strongly feel needs keeping for FUTURE use. it may be as small as a screw or as big as a mover`s box and when the mood strikes me to visit my private world of magic, I always feel rewarded with my finds.

just recently, I uncovered an old laptop bag……its old, dirty and outdated nevertheless it can still serve its purpose plus the size is just perfect for my our laptop ( my son co-owns it) and most importantly it ECONOMICAL. since the laptop is our constant travel companion (and yet I never got around buying the necessary bag :DD), its best I ditch my humongous tote bag and opt to these padded and just right-size laptop bag.

so after I dug out my treasure, I immediately searched the net for instructions on how to clean the bag. click here for instructions.

here are the before and after photos:

happy hunting everyone!

CHIBA ZOO

fine weather on a Saturday equals a visit to the zoo.

we took the Chiba Monorail from Sakusabe Station to Chiba Doubustu-koen (trans. zoo-park) Station. for more information click here . The fare costs 270 yen for adult and 140 yen for children 7 years old and above (under 7 is free)

positive points for Chiba Zoo

  • easy to find via Chiba monorail
  • most signage have English translations
  • plenty of trees for shade and benches to rest
  • variety of happy and healthy looking animals
  • smell rate is from zero to tolerable
  •  They have a petting zoo where children (くどものどうぶつえん)can groom and feed selected animals
  • a small amusement park
  • restaurants, food carts and vending machines for drinks

for more information click here

park operates from 9:30 to 4:30 everyday except Mondays and from December 29 to January 1.

On our way home, we saw test run of the new monorail car – The Urban Flyer here are some photos

Overall, it was a fun day!